10 Creative DIY Halloween Door Decor Ideas
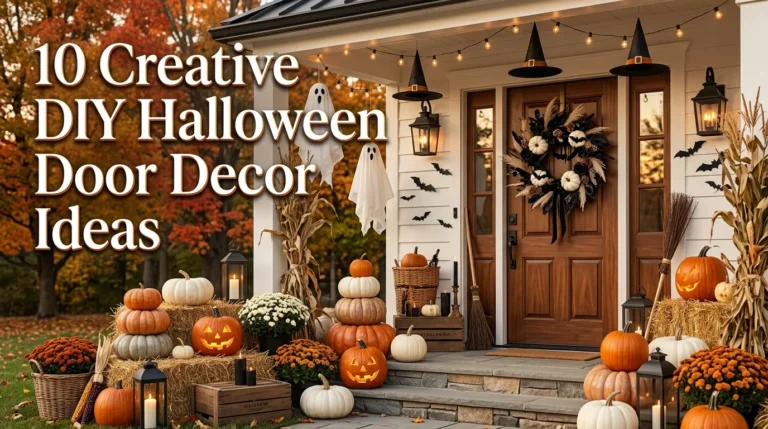
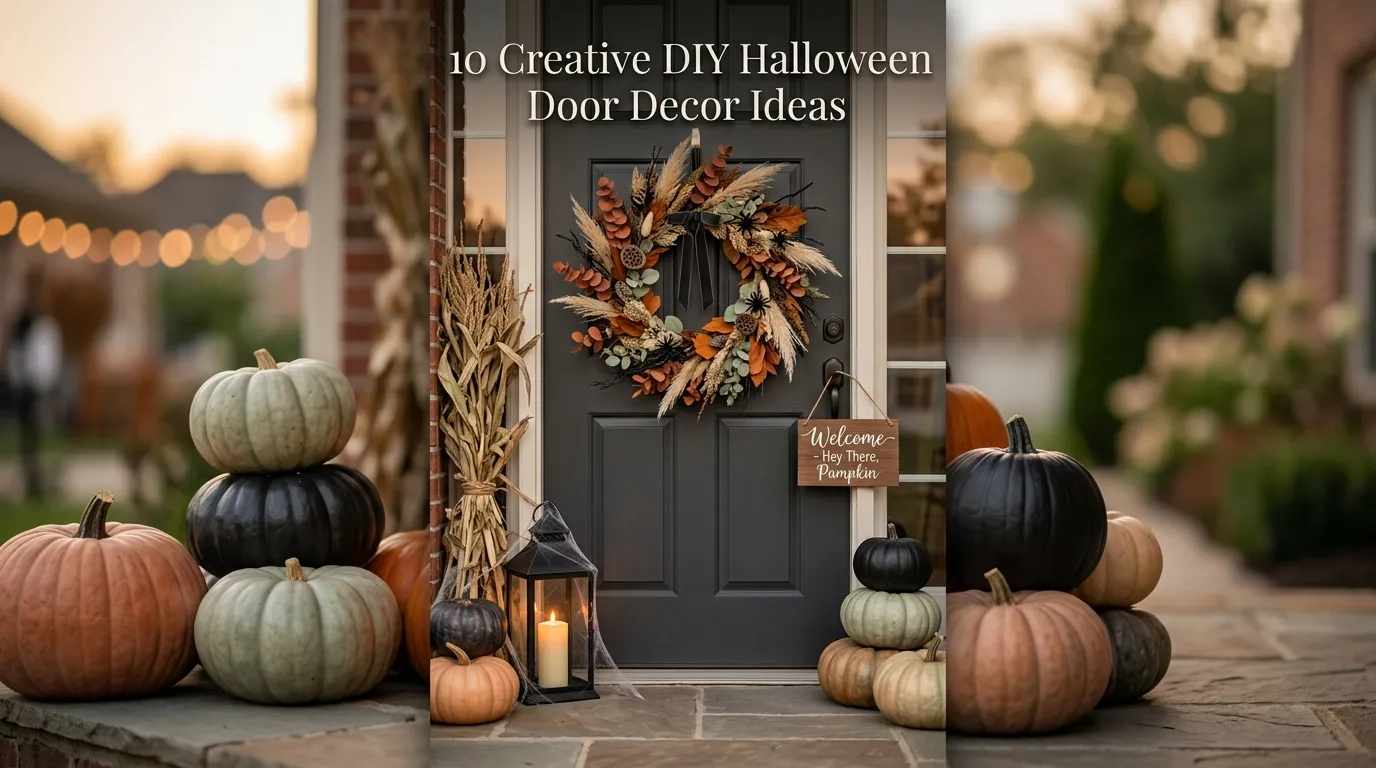
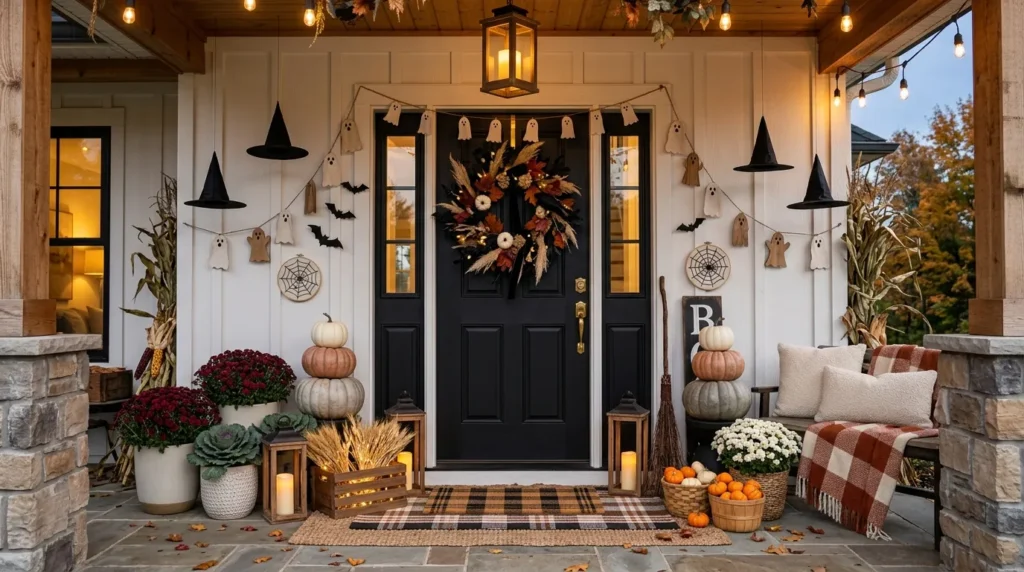
Your front door is the focal point of your home’s seasonal curb appeal. Designing a creative DIY Halloween door display sets an inviting, magical, or spooktacular tone for trick-or-treaters and autumn guests before they even step inside. Crafting your own front door Halloween decor allows you to customize colors, textures, and themes—turning simple craft store materials and natural fall accents into memorable front porch statement pieces.
The secret to high-impact DIY Halloween door decor lies in combining bold structural shapes with durable, weather-resistant materials and subtle lighting. From dramatic snake-entwined wreaths and floating witch hat canopies to playful monster doorways and vintage book page wreaths, these handmade projects cater to every aesthetic, whether you prefer whimsical, gothic, rustic, or eerie designs. These ten creative DIY ideas will help you craft a unique, eye-catching Halloween door transformation this season.
Table of Contents
- Medusa Snake Vine Wreath
- Floating Witch Hat Door Canopy
- Playful Monster Front Door Wrap
- Vintage Gothic Book Page Wreath
- Cascading 3D Bat Swarm Frame
- Glowing Jack-o’-Lantern Door Garland
- Spooky Skull and Dried Floral Hoop Wreath
- Mummy Door Wrap with Googly Eyes
- Poison Apple Botanical Door Swag
- Tattered Black Creepy Cloth Archway
1. Medusa Snake Vine Wreath
Quick Benefits
Benefit: Unique, dramatic twist on the traditional circular front door wreath
Benefit: Inexpensive craft using plastic toy snakes and basic wreath forms
Benefit: High-contrast matte black finish catches eyes from the street
Benefit: Durable plastic and grapevine construction stands up to fall weather
Benefit: Fast DIY project completed in under an hour
Why It Works
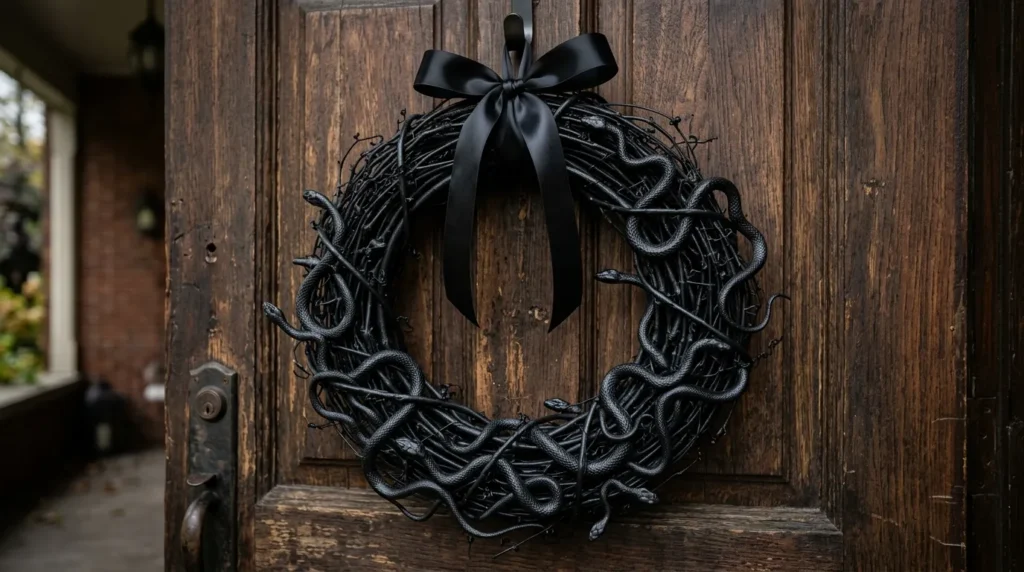
Inspired by classical mythology, a Medusa-themed snake wreath offers a sophisticated yet eerie alternative to standard Halloween door wreaths. Spray-painting plastic toy snakes and a natural grapevine wreath in a uniform matte black or metallic antique gold creates a sleek, sculptural texture that looks like an expensive boutique decor item.
How To DIY It
Start with an 18-inch natural grapevine wreath form. Weave 12 to 15 plastic toy snakes of varying lengths through the branches, securing them firmly with hot glue or thin black floral wire so their heads weave outward. Spray-paint the entire wreath assembly with two coats of outdoor matte black or antique brass spray paint. Once dry, hang it on your front door using a wide black satin ribbon.
2. Floating Witch Hat Door Canopy
Quick Benefits
Benefit: Adds whimsical, three-dimensional vertical depth above your doorway
Benefit: Lightweight materials move gently in evening autumn breezes
Benefit: Built-in battery LED lights cast a warm, magical glow on the door
Benefit: Easy to suspend using weather-resistant fishing line
Benefit: Budget-friendly bulk craft using inexpensive fabric witch hats
Why It Works
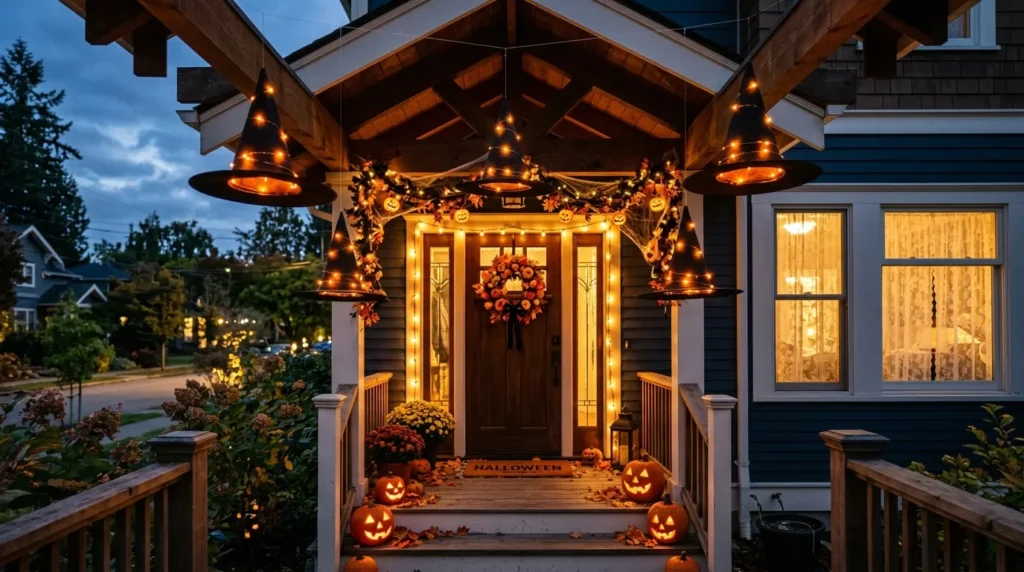
Hanging a cluster of black witch hats overhead directly in front of your doorway creates a magical floating canopy effect. Equipping the inside of each hat with a warm battery-operated LED puck light transforms your entryway at night, filling your porch threshold with a enchanting glow perfect for welcoming trick-or-treaters.
How To DIY It
Purchase three to five inexpensive black fabric witch hats. Using a sharp needle, thread clear 12-pound monofilament fishing line through the pointed tip of each hat. Secure a battery-operated warm-white LED puck light or LED tea light to the inside crown of each hat using heavy-duty double-sided tape. Tie the top of the fishing lines to removable outdoor ceiling hooks or your porch overhang at varied drop heights.
3. Playful Monster Front Door Wrap
Quick Benefits
Benefit: Delightful, family-friendly design that appeals to kids of all ages
Benefit: Uses inexpensive paper, felt, or plastic tablecloths
Benefit: Fully covers and protects your door without damaging paintwork
Benefit: Easily customizable with fun teeth, eyes, and fur colors
Benefit: Simple DIY project that children can help assemble
Why It Works
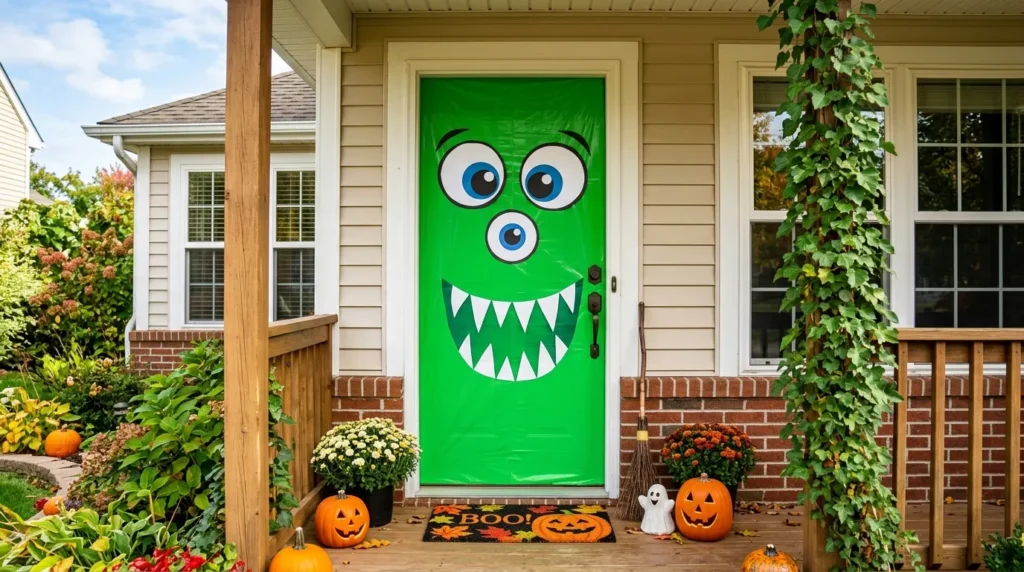
Transforming your entire front door into a giant, colorful monster face is an interactive, playful way to celebrate Halloween. Using the door’s existing shape as the “face,” you can add huge cartoon eyes, sharp paper teeth, and faux fur accents, creating a high-energy entrance that stands out vibrantly in any neighborhood.
How To DIY It
Wrap your front door in a bright green, purple, or orange outdoor plastic tablecloth, securing the edges tightly on the inside with painter’s tape. Cut three large circles out of white poster board and smaller black circles to glue on as multi-eyed monster pupils. Cut jagged white paper triangle strips for top and bottom teeth and tape them near the door frame center. Finish with a strip of faux fur trim along the top edge of the door frame.
4. Vintage Gothic Book Page Wreath
Quick Benefits
Benefit: Brings dark academic, literary elegance to your seasonal entrance
Benefit: Upcycles old yellowed book pages or vintage sheet music
Benefit: Deep cone layer structure adds dimensional depth
Benefit: Budget-friendly DIY made primarily from paper and cardboard
Benefit: Pairs beautifully with antique brass door hardware
Why It Works
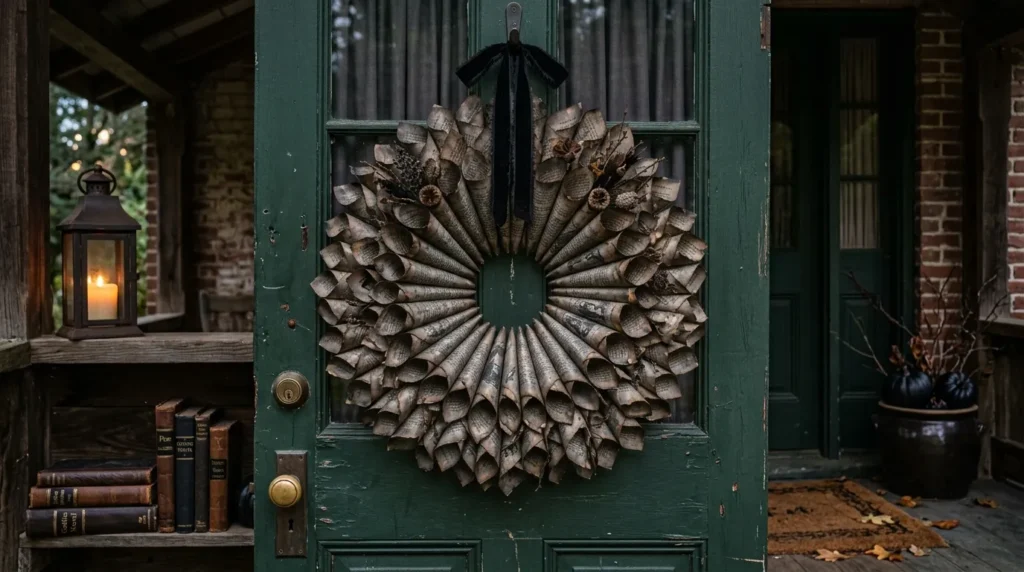
Paper cone wreaths crafted from aged book pages create a dramatic, Victorian gothic aesthetic. By lightly scorching or distressing the edges of paper cones rolled from classic gothic novels (like Frankenstein or Dracula), you form a lush, feathered wreath that brings sophisticated literary charm to covered front doors.
How To DIY It
Cut a 14-inch circular ring out of heavy corrugated cardboard. Tear pages from an old paperback book and roll each page into a tight cone, securing the end with hot glue. Hot-glue the paper cones in dense, overlapping concentric circles around the cardboard ring starting from the outer edge inward. Lightly dab the page tips with black ink or distressing stain. Note: Keep this paper wreath on a covered porch protected from direct rain.
5. Cascading 3D Bat Swarm Frame
Quick Benefits
Benefit: Dynamic, motion-filled visual effect across the door and porch
Benefit: Waterproof PVC plastic bats withstand rain and wind outdoors
Benefit: Low-cost DIY project using pre-cut PVC bat decals
Benefit: Easily installed and removed with surface-safe outdoor tape
Benefit: Accentuates the height of your front entrance architecture
Why It Works
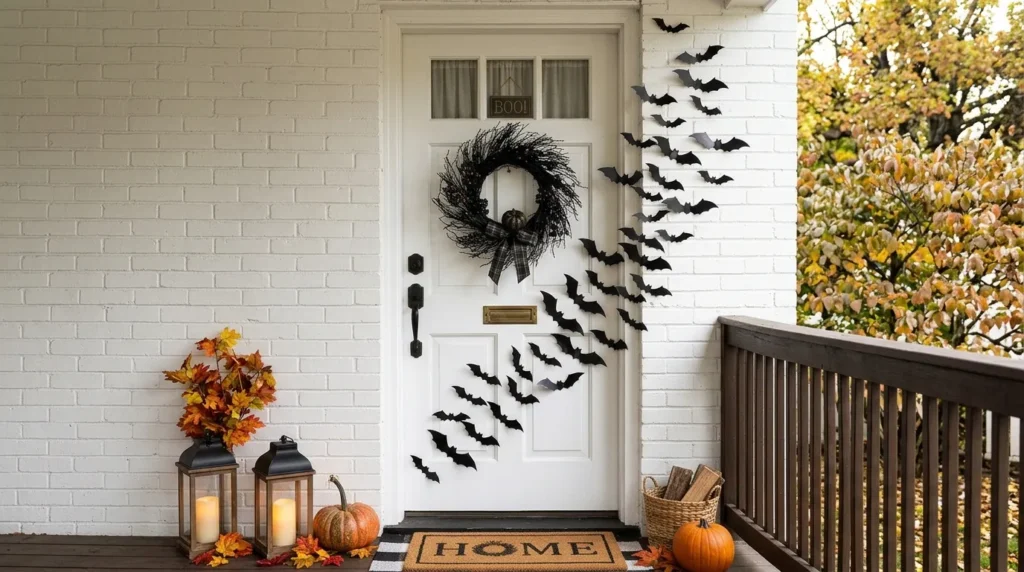
Creating a 3D bat swarm that appears to burst out from your door wreath or door frame adds instant movement and visual drama. The black PVC bat wings can be folded upward along pre-creased lines, casting realistic shadows against the door surface as porch lights shine on them at night.
How To DIY It
Hang a simple black twig wreath in the center of your front door. Take a pack of 3D waterproof PVC plastic bats in mixed sizes and bend their wings along the center folds. Using outdoor mounting putty or removable outdoor tape, stick the bats in a curving, upward diagonal flight pattern starting small from the bottom corner of the door frame, fanning out across the wreath, and sweeping high onto the porch wall above.
6. Glowing Jack-o’-Lantern Door Garland
Quick Benefits
Benefit: Frames your doorway with a classic, warm Halloween motif
Benefit: Features bright evening illumination for maximum curb appeal
Benefit: Lightweight plastic or papier-mâché gourds wrap easily
Benefit: Reusable garland assembly lasts year after year
Benefit: Welcomes visitors with a friendly, nostalgic glow
Why It Works
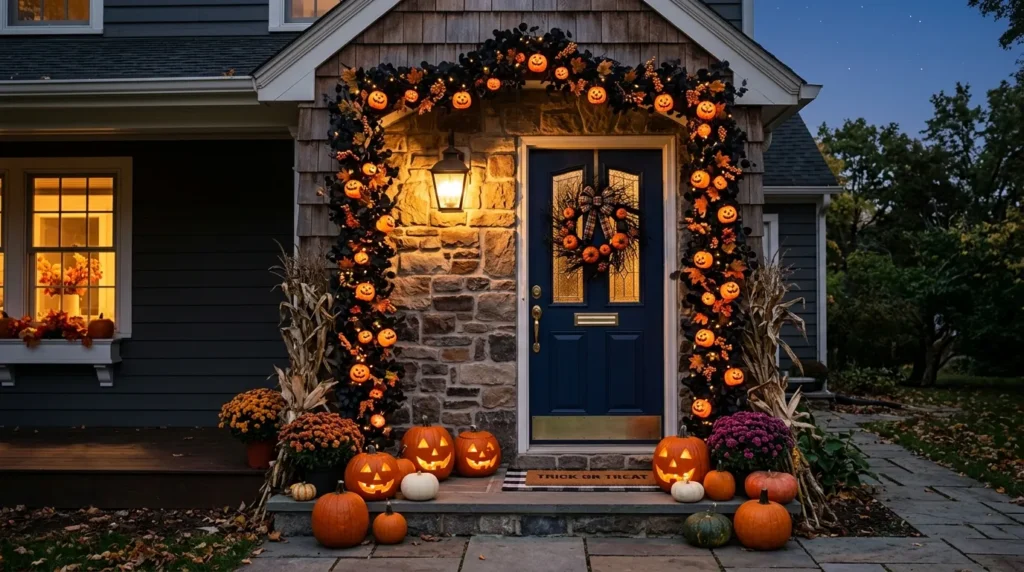
A full archway garland intermixed with mini glowing jack-o’-lanterns creates a warm, framed frame around your front entrance. Combining natural autumn greenery or dark black eucalyptus with glowing pumpkin faces provides both daytime color and vibrant nighttime contrast.
How To DIY It
Start with an 8-foot faux black eucalyptus or orange maple leaf garland. Purchase 8 to 10 lightweight mini plastic jack-o’-lantern buckets or craft gourds. Use a utility knife to cut a small hole in the back of each gourd. Insert individual bulbs from a strand of warm outdoor LED string lights into the back of each pumpkin, securing them with hot glue. Wrap the illuminated pumpkin garland around your door frame using outdoor garland hooks.
7. Spooky Skull and Dried Floral Hoop Wreath
Quick Benefits
Benefit: Merges trendy bohemian dried florals with classic Halloween motifs
Benefit: Modern asymmetrical design feels elevated and chic
Benefit: Durable floral wire construction keeps stems secure outdoors
Benefit: Earthy, neutral color palette matches modern home facades
Benefit: Lightweight structure hangs easily on any door hook
Why It Works
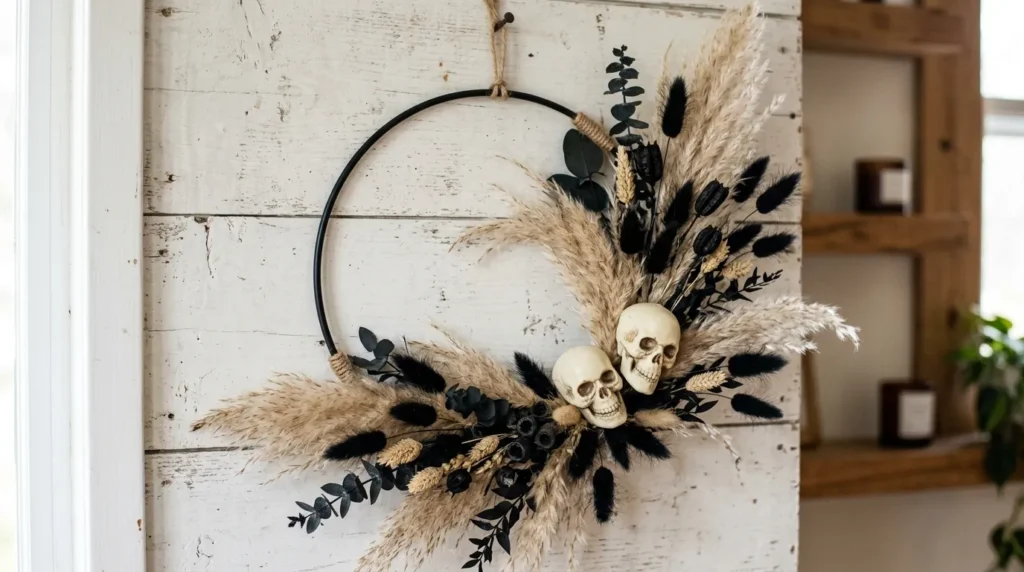
Hoop wreaths featuring asymmetrical arrangements offer a modern alternative to traditional full wreaths. Combining bleached dried botanicals—like pampas grass, bunny tails, and preserved eucalyptus—with miniature foam or plastic skulls balances soft, organic textures with dark, haunting seasonal themes.
How To DIY It
Take an 18-inch gold or black metal floral hoop. Using floral wire and hot glue, secure a bundle of dried pampas grass, dark preserved eucalyptus, and black lagurus (bunny tails) along one side of the hoop, leaving the other half exposed. Nestled into the center of the floral bundle, hot-glue two miniature foam skulls spray-painted in matte cream or vintage charcoal. Hang with a leather cord or sheer ribbon.
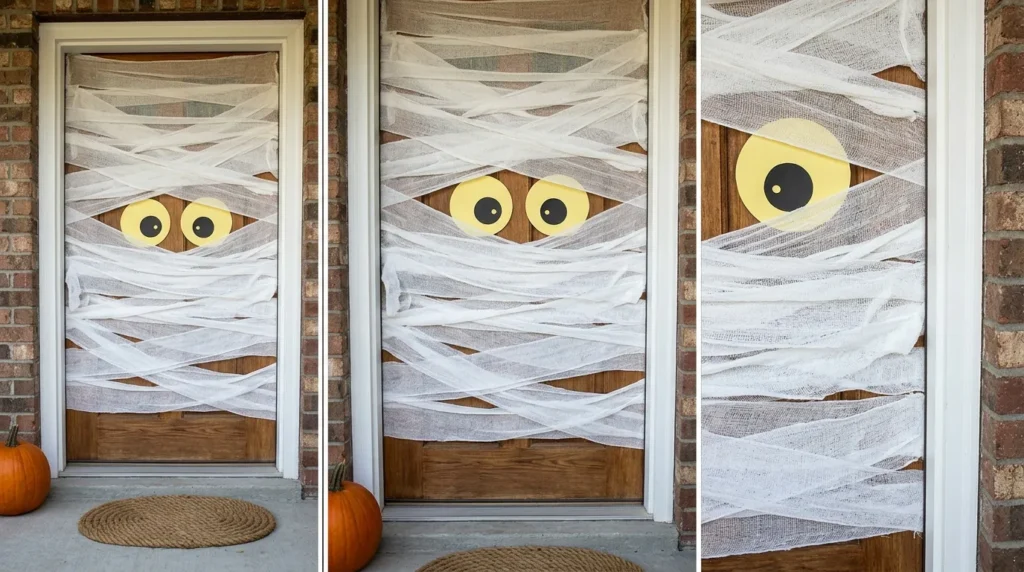
8. Mummy Door Wrap with Googly Eyes
Quick Benefits
Benefit: Ultra-fast 15-minute DIY project with minimal materials needed
Benefit: Low-cost transformation using affordable white crepe paper or gauze
Benefit: Safe for all door finishes with no permanent adhesives used
Benefit: High-contrast visual appeal visible from down the street
Benefit: Highly engaging and humorous design for neighborhood children
Why It Works
Wrapping your front door to resemble an ancient Egyptian mummy is a classic, high-impact DIY hack. Overlapping crisscrossed white gauze or crepe paper strips gives the door a textured, wrapped look, while two huge glowing eyes peeking out from a gap in the wrapping add personality and humor.
How To DIY It
Cut two 8-inch circles out of yellow or bright green cardstock and draw black pupil centers to make giant eyes. Tape the eyes to the upper third of your door using painter’s tape. Take rolls of white medical gauze, white crepe paper streamer, or torn white bedsheet strips and stretch them horizontally across the door in crisscrossing, overlapping angles. Leave a slight gap over the eyes so they peek through the mummy wrappings.
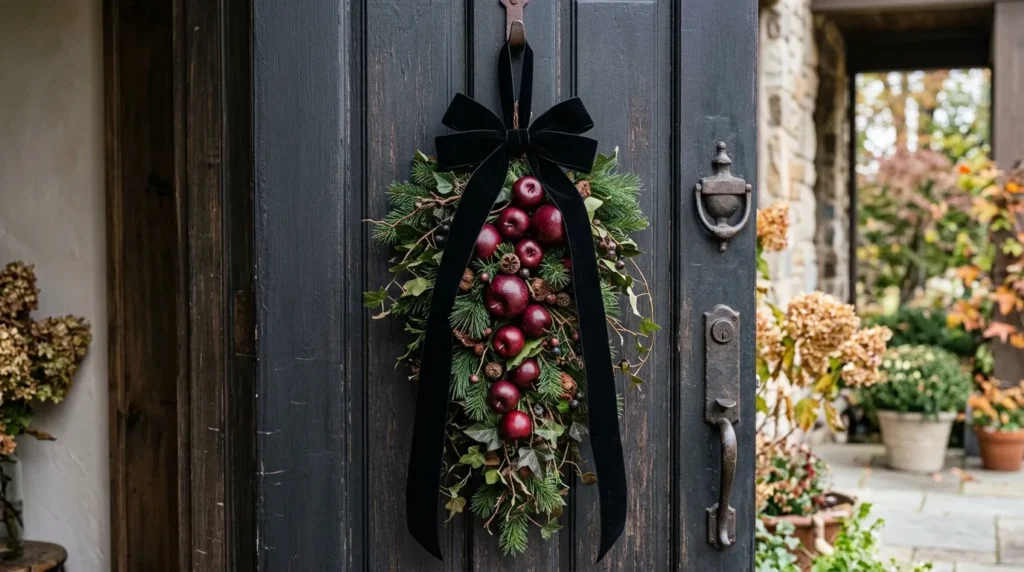
9. Poison Apple Botanical Door Swag
Quick Benefits
Benefit: Unique vertical alternative to standard round wreaths
Benefit: Rich crimson red and dark green color scheme
Benefit: Storybook fairytale motif adds dark fantasy charm
Benefit: Weather-proof artificial fruit and greenery hold up outdoors
Benefit: Easy to tie together with wire and a large decorative bow
Why It Works
Door swags offer a cascading, teardrop-shaped botanical display that accentuates vertical door panels. Inspired by classic fairytales, combining deep red faux apples, dark moody greenery, and subtle iridescent dripping details creates a rich, enchanted poison apple door accent.
How To DIY It
Bundle together artificial pine branches, dark ivy, and deep red faux eucalyptus stems in a downward teardrop shape, securing the top stems together with heavy floral wire. Weave in six artificial deep red faux apples using floral picks. For a “poison” effect, apply a few drips of black glitter hot glue or green puffy paint over the top of the apples. Finish the top binding with a large black velvet ribbon bow and hang.
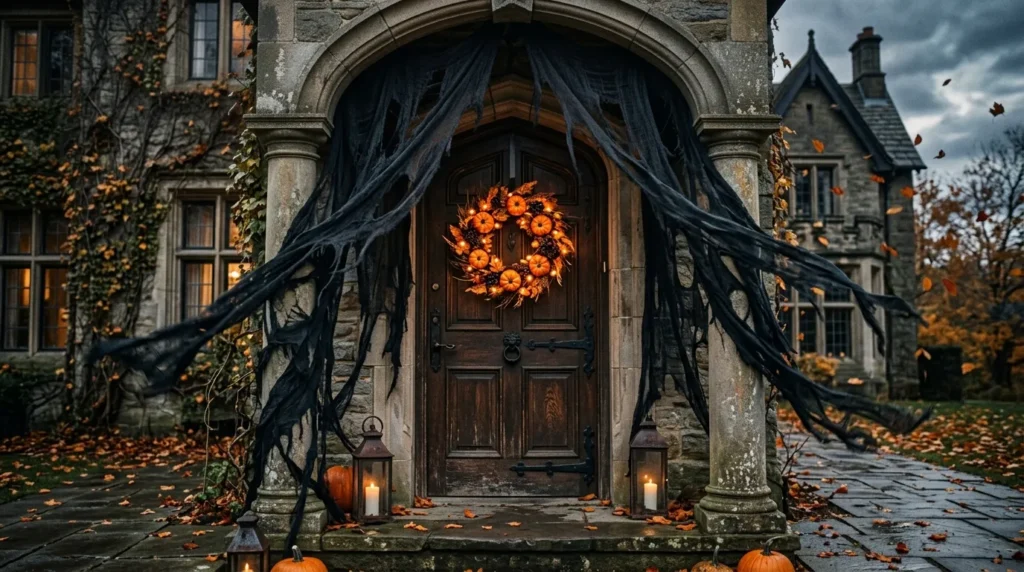
10. Tattered Black Creepy Cloth Archway
Quick Benefits
Benefit: Delivers dramatic, aged haunted house texture
Benefit: Lightweight gauze flutters gently in outdoor wind
Benefit: Extremely low-cost material covers large door frames
Benefit: Easy to layer with lanterns, spiderwebs, or garlands
Benefit: Quick installation using simple outdoor clips or staples
Why It Works
Shredded black cheesecloth or creepy cloth provides instant gothic texture that frames your entire door opening. When shredded edges flutter in autumn breezes, it creates eerie movement and deep shadows around your entryway, making your door feel like the entrance to an ancient haunted manor.
How To DIY It
Purchase two large packs of black loose-weave creepy cloth. Use scissors to cut random jagged slits along the bottom edges and pull at the threads to stretch and fray the fabric naturally. Drape the cloth across the top of your exterior door frame, letting the shredded sides hang long down both sides of the door. Secure the cloth at the top corners with outdoor adhesive clips, and layer a glowing pumpkin garland or skull wreath directly over the center.
Related Articles
- How to Style a Cohesive Halloween Porch
- Modern Gothic Fall Home Decor Guide
- Easy DIY Halloween Craft Ideas for Families
- Outdoor Lighting Tips for Seasonal Curb Appeal
- Transitioning Halloween Entrance Decor into Thanksgiving
FAQ Section
How do I hang heavy DIY wreaths on my front door without drilling holes?
Use heavy-duty magnetic wreath hangers if you have a steel door, or clear outdoor adhesive hooks (such as Command Outdoor Hooks rated for 5+ lbs) on smooth wood or glass doors. Alternatively, drape a wide decorative satin ribbon over the top edge of your door and secure the ribbon to the top interior edge of the door using heavy-duty thumbtacks or painter’s tape.
What DIY materials hold up best on a front door exposed to rain and wind?
Opt for waterproof and synthetic materials like PVC plastic 3D bats, painted grapevine or metal floral hoops, plastic toy snakes, synthetic faux foliage, outdoor-rated LED string lights, and sealed ceramic or foam props. If using paper or ribbon crafts, ensure your front door is protected under a deep covered porch or spray the finished craft with a clear waterproof acrylic sealer.
How can I make my DIY Halloween door decor look expensive rather than cheap?
Focus on a unified, intentional color palette (such as all-black, metallic brass and green, or desaturated cream and rust) rather than mixing too many competing bright colors. Using matte spray paint on plastic craft items instantly gives them a high-end ceramic, metal, or stone look. Layering rich textures like velvet ribbon, natural grapevine, and warm LED lighting also elevates the final look.
When should I put up my DIY Halloween door decor?
Most homeowners install front door Halloween decor during the first week of October to enjoy the display all month long. If your project features broader autumn elements like dried florals, dark greenery, or neutral gourds, you can set it up in late September and simply adjust specific spooky props after Halloween night.
How do I store handmade Halloween wreaths and door decor safely for next year?
Store delicate handmade wreaths and swags inside clear plastic wreath storage bags or sturdy cardboard boxes lined with tissue paper to prevent crushing. Store flat elements like 3D PVC bats and plastic signage in labeled clear storage bins kept in a cool, dry area away from direct sunlight or extreme heat that could melt hot glue attachments.
Conclusion
Crafting your own DIY Halloween door decor is a fun, rewarding way to showcase your personal creativity while giving your home outstanding seasonal curb appeal. By mixing structural DIY elements like Medusa snake wreaths, floating witch hat canopies, and cascading 3D bat swarms with warm ambient lighting, you transform your entryway into a welcoming, hauntingly beautiful autumn portal.
Remember that impactful door decor doesn’t require complex tools or high expenses. Focus on good contrast, durable materials, and thoughtful placement that highlights your door’s unique architectural features. Select your favorite DIY project, gather your craft supplies, and create a front door display that delights neighborhood trick-or-treaters and guests all October long.