
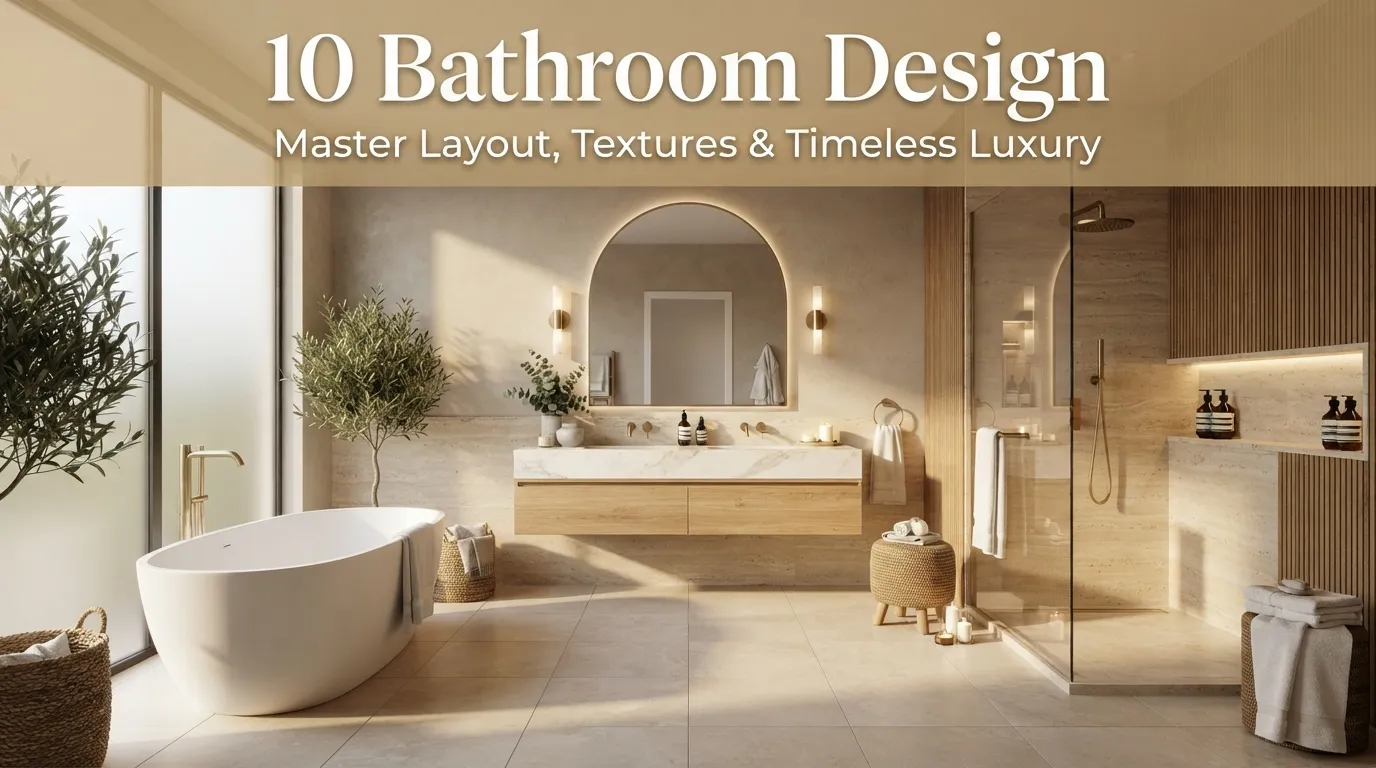
10 Bathroom Design: How to Master Layout, Textures, and Timeless Luxury in Your Home
Stepping into a poorly planned bathroom first thing in the morning can feel like an immediate roadblock to a productive day. We have all experienced the frustration of uncoordinated fixtures, insufficient lighting, and awkward spatial flow that leaves you feeling claustrophobic instead of refreshed. If you’re anything like me, you consider your bathroom to be much more than a clinical place to wash up; it should act as a private sanctuary where you can truly unwind. Yet, a mistake many homeowners make when addressing a remodel is focusing entirely on replacing old fixtures with identical shapes while ignoring the deeper architectural fundamentals. They assume that basic updates will automatically solve their daily frustrations, only to realize later that the physical flow of the space still feels stiff and completely uninviting.
Throughout my fifteen years as a home publisher and stylist, I have analyzed thousands of floor plans to figure out exactly what separates a generic space from a world-class resort environment. The secret doesn’t lie in purchasing the most expensive premium marble or chasing fleeting online fads. Instead, it comes down to understanding how light travels across different surfaces, how smart layout choices can mask necessary functional elements, and how mixing contrasting materials builds visual warmth. Good design should seamlessly support your personal daily routines while providing the stunning imagery that drives massive engagement on highly visual platforms.
In this ultimate guide, we are looking past surface-level updates to study the structural choices, texture combinations, and lifestyle integration rules that elevate modern homes. We will cover actionable techniques that work beautifully for spacious primary suites, cozy rental powder rooms, and everything in between. By shifting your approach toward these professional layout methods, you will gain the clarity needed to create a stunning, publication-ready environment that supports long-term comfort and style.
Table of Contents
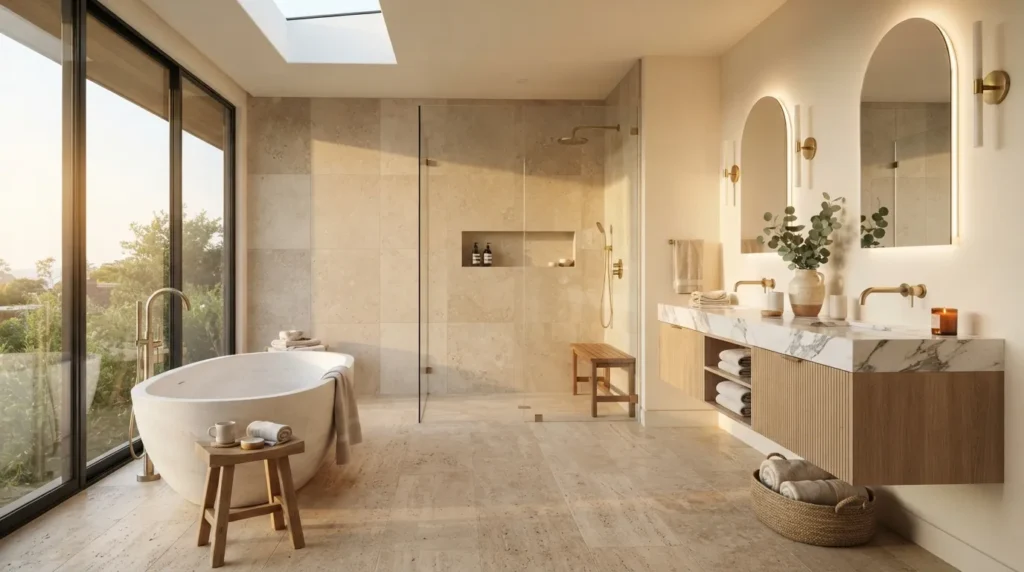
- Ribbed White Oak Vanities Learn how custom wood grain textures anchor modern vanities with warm architectural interest.
- Zellige Tile Backsplashes Discover the art of using irregular hand-molded clay surfaces to reflect soft ambient light.
- Frameless Translucent Partitions Explore how reeded glass half-walls separate utility zones without blocking visual room depth.
- Monochromatic Plaster Finishes See how seamless waterproof textures eliminate grout lines to build serene spa environments.
- Mixed Metallic Accents Master the art of pairing cool and warm hardware finishes for a beautifully curated look.
- Freestanding Architectural Tubs Find out how positioning sculptural soaking tubs creates an unmistakable high-end visual anchor.
- Low Profile Linear Drains Discover how flush floor engineering allows tile patterns to flow smoothly into walk-in showers.
- Integrated Ledge Storage Learn how continuous wall-to-wall ledges replace messy corner shelves with sleek architectural lines.
- Layered Low Voltage Sconces See how placing dimmable eye-level side lighting removes harsh facial shadows at the mirror.
- Tapered Wooden Stools Explore how adding rustic organic antique seating introduces immediate history, warmth, and soul.
1. Ribbed White Oak Vanities
Quick Benefits
- Adds deep architectural character
- Softens cold stone countertops
- Conceals cabinet door seams
- Elongates vertical room height
- Works across diverse aesthetics
Why It Works
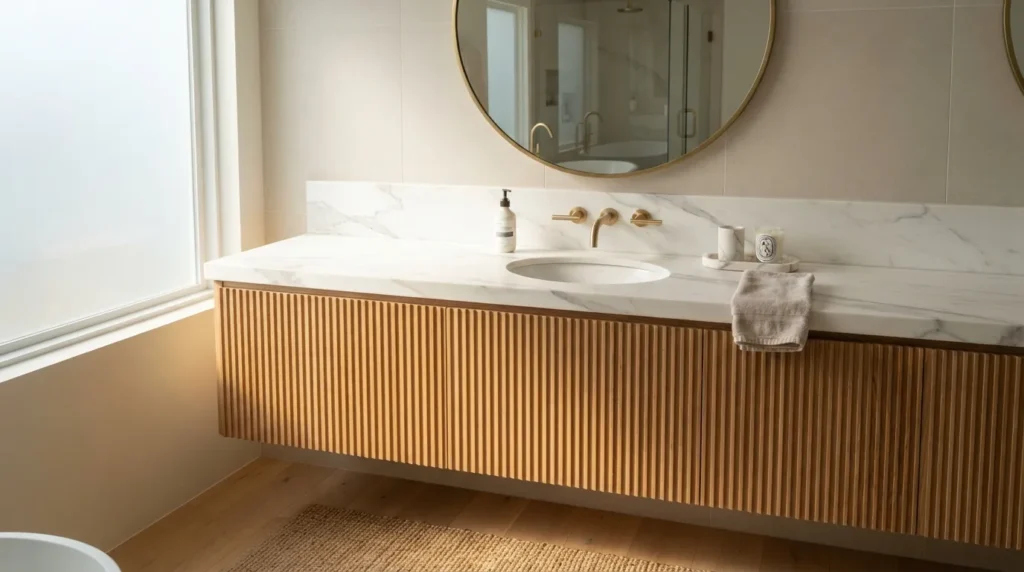
One simple trick I always suggest to immediately ground a sterile space is to introduce substantial organic wood elements right at the primary focal station. A basic flat-panel white cabinet often looks cold and corporate under bright vanity bulbs. In contrast, a custom ribbed white oak finish creates a stunning rhythmic pattern of light and subtle shadow that catches the eye instantly. The vertical lines work beautifully to guide the eye upward, making standard ceilings feel much more grand. In my experience, incorporating these subtle wood textures prevents a neutral layout from looking flat, ensuring your central station feels high-end, custom-made, and rich with character.
How To Style It
When implementing a ribbed white oak vanity, select a continuous slab of light stone, such as an polished Calacatta marble or a soft warm quartz with minimal gray veining, to run completely flat across the top surface. Install sleek, wall-mounted widespread faucets in a soft champagne bronze or brushed gold finish to enhance the natural honey undertones of the oak wood. Keep the immediate countertop area beautifully edited by styling a single raw soapstone tray to hold your daily skincare bottles alongside a simple white ceramic cup. Keep the lower floor tiles large and light-toned to allow the intricate fluted wood patterns to stand out as the undisputed focal feature of the wall.
2. Zellige Tile Backsplashes
Quick Benefits
- Reflects light beautifully and unevenly
- Offers unique handmade imperfections
- Softens stark contemporary fixtures
- Resists moisture and stains long-term
- Creates incredible artisan charm
Why It Works
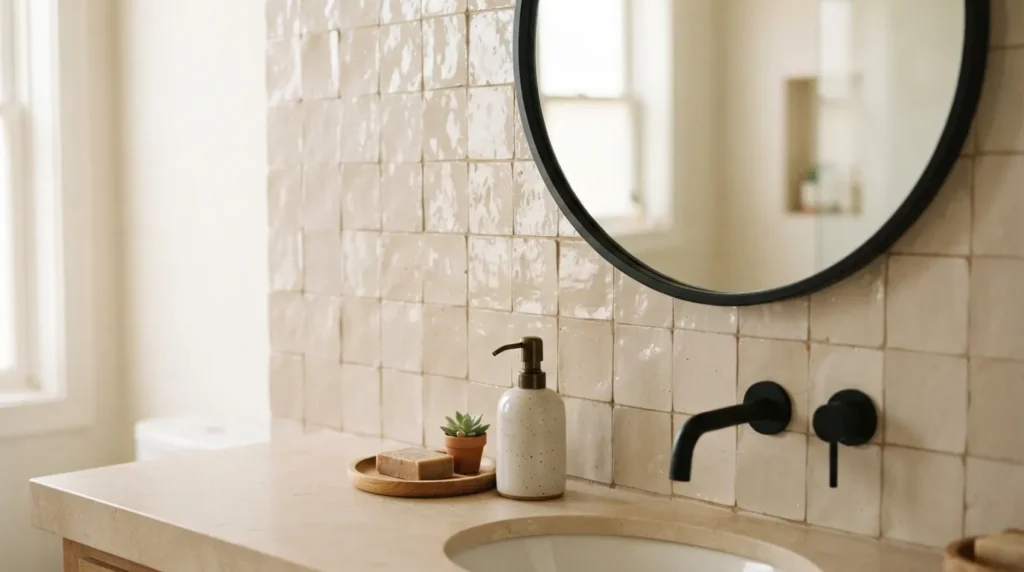
I’ve seen this idea transform spaces that originally felt completely devoid of personality or warmth. Standard machine-cut subway tile certainly has its place, but its uniform perfection can sometimes make a residential room feel overly clinical. Moroccan zellige tiles are hand-molded from raw clay and fired individually, meaning every single piece features slight variations in color, depth, and edge smoothness. When installed tightly together, these tiny variations catch natural daylight from different angles, creating a beautiful shimmering effect that makes the wall appear alive while effortlessly breaking up the harshness of neighboring metal fixtures.
How To Style It
Run your zellige tiles from the top of the vanity splash all the way up to the ceiling line behind an arched mirror to maximize the reflective wall coverage. Opt for a soft tonal palette like a warm milk white, pale seafoam gray, or soft natural cream to keep the look breezy and cohesive. Use an un-sanded grout line matched closely to the tile shade to minimize dark grid lines, allowing the natural texture of the clay to speak for itself. Complete the look by hanging a simple black metal frame mirror over the tile to create a clean, modern graphic frame against the shimmering artisan backdrop.
3. Frameless Translucent Partitions
Quick Benefits
- Shields toilet zones elegantly
- Maintains open ambient light paths
- Preserves valuable physical square footage
- Introduces elegant geometric patterns
- Cleans easily with standard tools
Why It Works
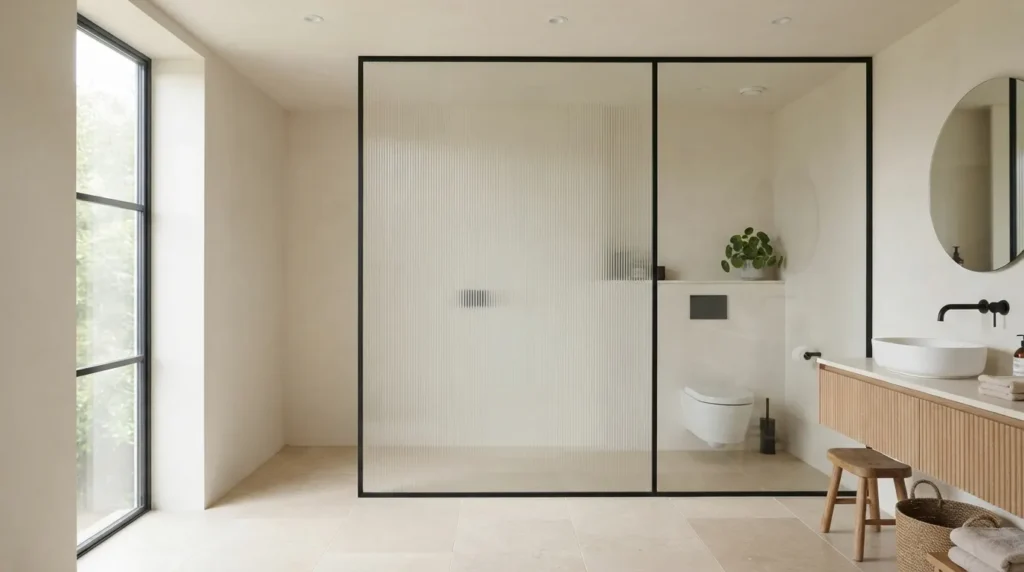
A mistake many homeowners make when designing a compact floor plan is building solid drywall partition walls to hide the commode or shower zone. While privacy is certainly important, these thick drywall sections completely block natural light circulation and slice the room into dark, cramped cubicles. Switching to a frameless translucent glass partition solves this structural problem perfectly. Utilizing reeded, fluted, or frosted glass panels allows you to obscure the direct line of sight while allowing daylight to filter through, keeping the room’s total spatial volume completely open and integrated.
How To Style It
Install a floor-to-ceiling reeded glass panel secured with a ultra-low-profile matte black or brushed bronze metal channel along the floor and ceiling track. Position the partition right between the vanity counter and the wet zone to serve as an elegant structural windbreak. Pair the geometric texture of the reeded glass with clean, minimalist wall-hung fixtures to emphasize the contemporary look. To maintain a polished, high-end look, keep the glass surface completely free of frames, letting the texture of the glass panel blend seamlessly into the surrounding architecture.
4. Monochromatic Plaster Finishes
Quick Benefits
- Eliminates messy grout lines completely
- Creates an expansive visual flow
- Delivers a true spa-like feel
- Adapts beautifully to damp environments
- Softens harsh room corners
Why It Works
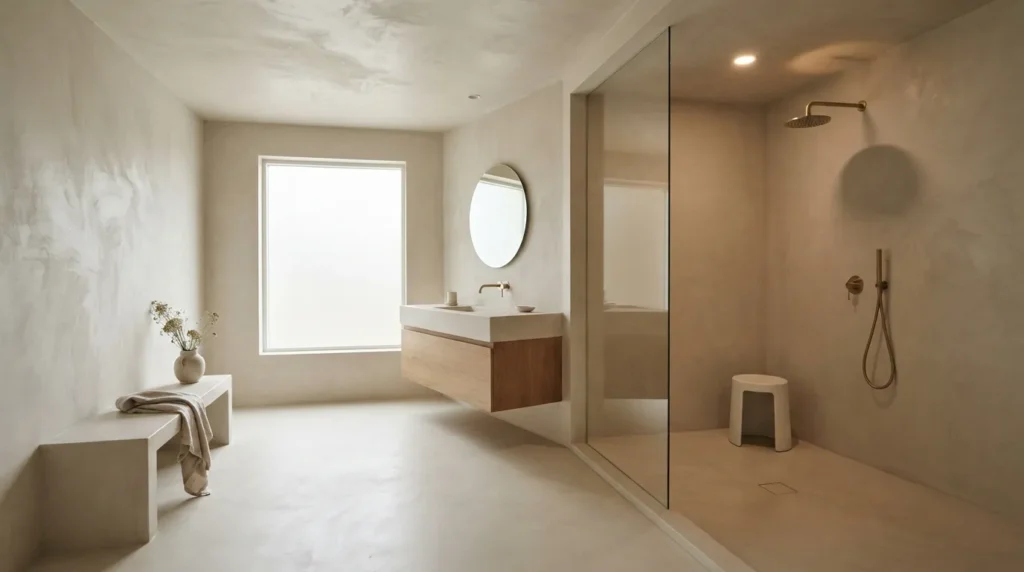
When you slice up a small or medium room with different colored flooring, bright wall tiles, and contrasting paint, you establish distinct visual boundaries that constantly remind you of the room’s limited footprint. That’s why many designers recommend a monochromatic plaster finish for an upscale, seamless look. Utilizing high-performance waterproof plaster across the walls and ceiling creates a continuous, unified envelope. The hard architectural corners seem to fade out of focus, resulting in an exceptionally calming, texturally rich environment that feels open, expensive, and deeply peaceful.
How To Style It
Select a nature-inspired tone such as an ultra-pale warm greige, a soft desert sand, or a muted olive clay. Apply the waterproof plaster technique smoothly across the main wall surfaces, carrying it directly into the shower enclosure and up onto the ceiling plane for total immersion. Introduce contrast by pairing this soft matte texture with highly polished natural stone countertops and heavy, solid brass plumbing fixtures. Soften the floor space with a thick, neutral organic cotton bath mat and a simple linen window drape to complement the earthy look.
5. Mixed Metallic Accents
Quick Benefits
- Prevents a matchy-matchy look
- Adds layers of curated history
- Balances warm and cool tones
- Elevates basic builder-grade spaces
- Injects rich personality effortlessly
Why It Works
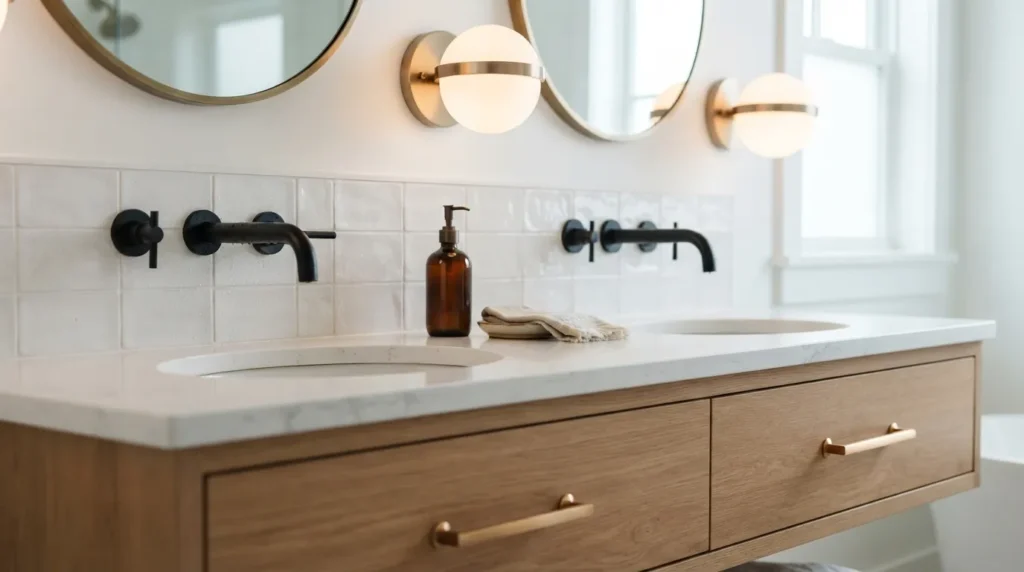
In my experience, sticking strictly to one single metal finish throughout an entire room can make the design look a bit flat, like a showroom display page rather than a custom home. Mixing metallic finishes is a fantastic way to give your layout a curated, designer look that feels built over time. The trick is to establish a dominant metal finish to carry the heavy functional load while using a contrasting metal for your smaller decorative accents, balancing cool and warm undertones to keep the room visually engaging.
How To Style It
Choose a sleek matte black or an oil-rubbed bronze as your primary finish for the heavy plumbing fixtures, including your vanity faucets and shower trim kits. Then, introduce a secondary finish like a rich brushed brass or polished copper for the smaller items—think vanity mirror frames, light sconces, and cabinet drawer pulls. Keep the design clean by ensuring that metals in the same horizontal zone match, allowing the contrast to occur vertically between your wall lights and your sink faucets for a balanced, high-end look.
6. Freestanding Architectural Tubs
Quick Benefits
- Serves as a dramatic focal point
- Maximizes perimeter floor exposure
- Offers a luxurious soaking experience
- Simplifies under-tub floor cleaning
- Adapts to diverse layout corners
Why It Works
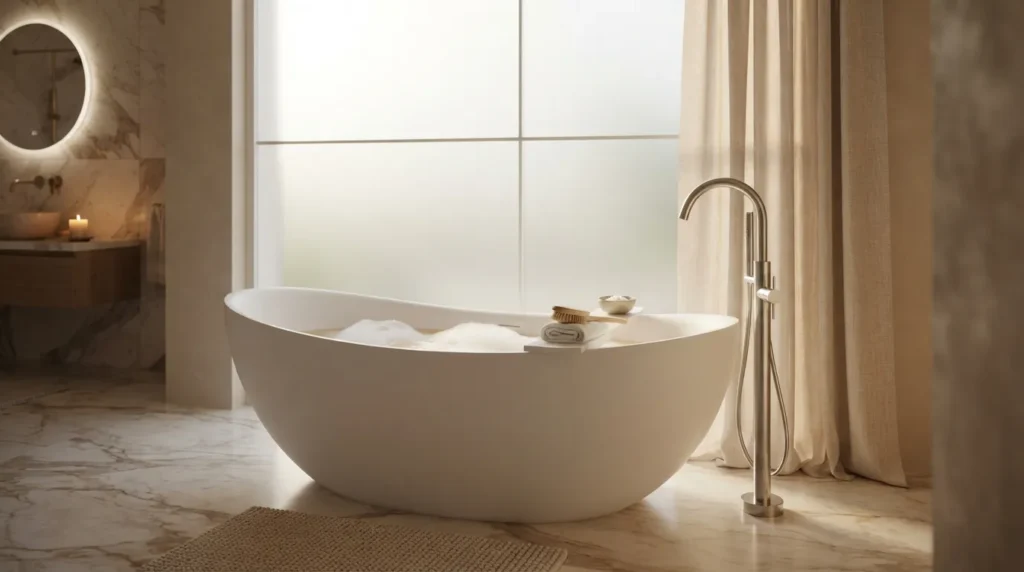
Traditional drop-in alcove tubs with heavy tiled surrounds can easily swallow up a room’s physical layout, acting like giant blocks that compress the available floor plan. A freestanding architectural tub does the exact opposite by letting light and space circulate freely around its entire silhouette. Whether your design taste leans toward a modern matte white resin bowl or a classic clawfoot shape, these structural tubs function as pure art pieces that instantly elevate the room’s perceived luxury, making the entire bathroom design feel like a boutique resort.
How To Style It
Position your freestanding tub directly underneath a large window or centered against a prominent accent wall to highlight its structural form. Pair the tub with a floor-mounted tub filler finished in a striking matte black or polished nickel to frame the side cleanly. Directly beside the soaking zone, place a small, low-profile stone or natural wood side table to hold a luxury bath oil bottle, a fresh towel, and a candle, ensuring your relaxation zone looks beautifully intentional and ready for use.
7. Low Profile Linear Drains
Quick Benefits
- Creates a seamless curbless floor
- Allows large format tile layouts
- Evacuates water rapidly and efficiently
- Minimizes trip hazards completely
- Delivers an ultra-clean appearance
Why It Works
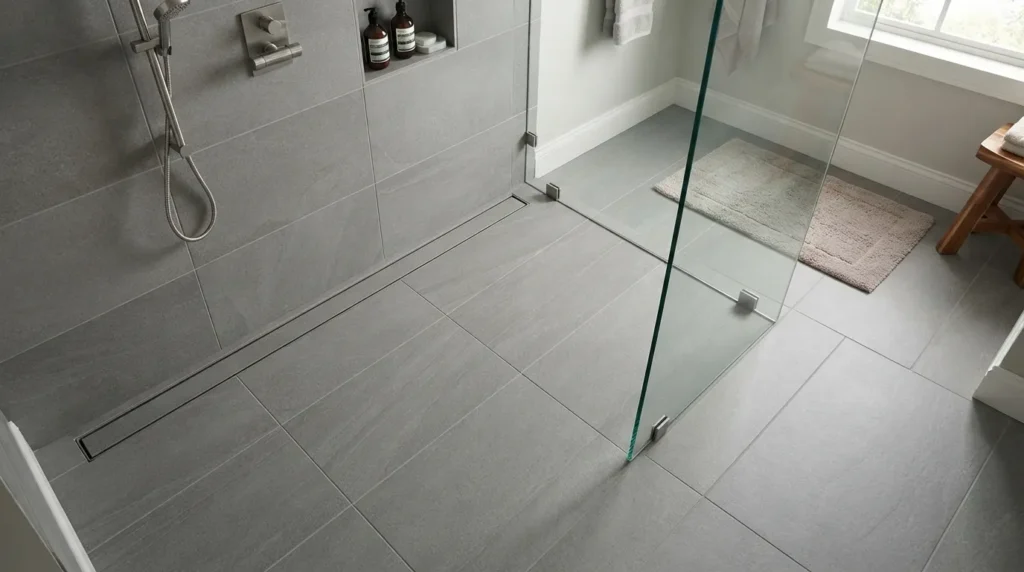
Traditional center shower drains require the floor to slope inward from all four corners, which means you are forced to use tiny mosaic tiles in the shower stall to handle the complex slope angles. This breaks up your flooring pattern right at the shower door, making the room feel divided. A low-profile linear drain requires the floor to slope in only one single direction. This engineering shift allows you to carry your large-format main floor tiles straight into the wet zone without any structural interruptions, keeping your floor lines long, clean, and completely integrated.
How To Style It
Install a tile-in linear drain that sits completely flush along the back wall of your walk-in shower stall. This option allows you to insert a matching piece of your large floor tile directly into the top channel of the drain, rendering the drainage slot practically invisible except for a slim perimeter opening. Combine this seamless flooring transition with a frameless pane of clear glass to let the eye track the tile pattern all the way to the back wall, instantly maximizing the visual scale of your layout.
8. Integrated Ledge Storage
Quick Benefits
- Replaces cluttered, rusty corner caddies
- Maintains long, clean architectural lines
- Offers expansive storage for products
- Integrates perfectly into main walls
- Provides a highly durable shelf
Why It Works
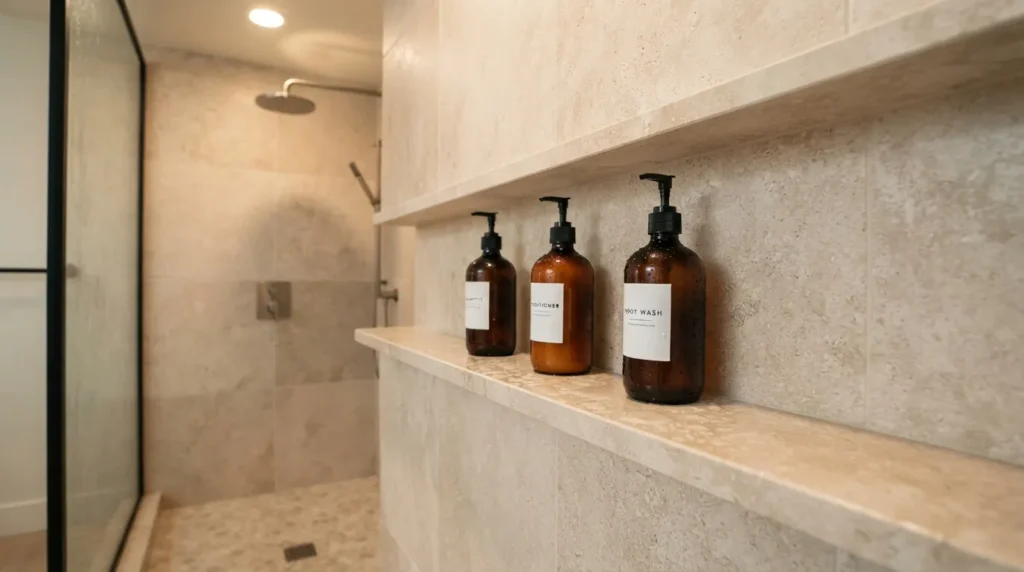
I’ve noticed that even the most beautiful spaces can be instantly ruined by the visual chaos of plastic product bottles scattered across the floor or hanging from showerheads. While small recessed niches are excellent, an integrated wall ledge offers a continuous, high-end architectural alternative. By packing out a lower section of the wall by four to six inches, you create a permanent, full-length shelf that runs wall-to-wall. This design provides plenty of room for all your daily products while keeping the sightlines clean, structured, and completely organized.
How To Style It
Construct a waist-high integrated ledge that runs along the entire length of your wet wall or right behind a freestanding soaking tub. Cap the top surface of the ledge with a solid, single piece of polished stone or matching quartz to ensure a completely seamless, waterproof shelf that is easy to wipe clean. Style the ledge by arranging your primary wash items into matching amber glass pump bottles, keeping them neatly spaced to maintain a clean, high-end look that feels like a premium luxury spa.
9. Layered Low Voltage Sconces
Quick Benefits
- Removes harsh overhead facial shadows
- Introduces soft, flattering ambient glows
- Serves as a beautiful decorative framing
- Allows custom dimming for nighttime
- Modernizes basic vanity stations
Why It Works
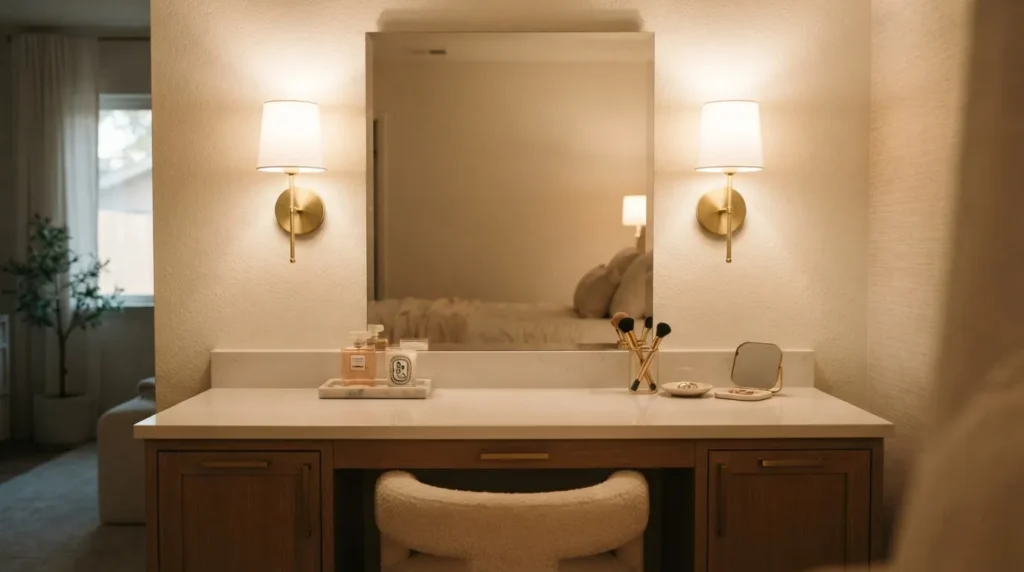
One common mistake many homeowners make when designing their lighting layout is relying entirely on a single row of recessed ceiling cans directly over the sink basin. This top-down lighting casts harsh, unflattering shadows under your eyes, nose, and chin, making your morning routine feel frustrating. Layered low-voltage wall sconces placed right at eye level solve this problem beautifully. By framing the mirror with light from the sides, you cast an even, diffuse glow across your face that mimics natural daylight while adding an elegant layer of accent lighting to the room.
How To Style It
Mount a pair of slim, modern glass globe or fabric-shaded sconces directly onto the vanity wall, positioning them exactly sixty to sixty-four inches from the finished floorboards so the light sits right at eye level. Space them roughly twenty-eight to thirty-six inches apart to frame your central mirror cleanly. Wire these light fixtures to an independent dimmer switch separate from your main overhead lights, allowing you to lower the light levels in the evening to create a soft, relaxing ambiance for a soothing night bath.
10. Tapered Wooden Stools
Quick Benefits
- Injects immediate character and history
- Introduces beautiful natural organic warmth
- Breaks up cold, hard stone surfaces
- Offers handy mobile surface utility
- Makes modern spaces feel lived-in
Why It Works
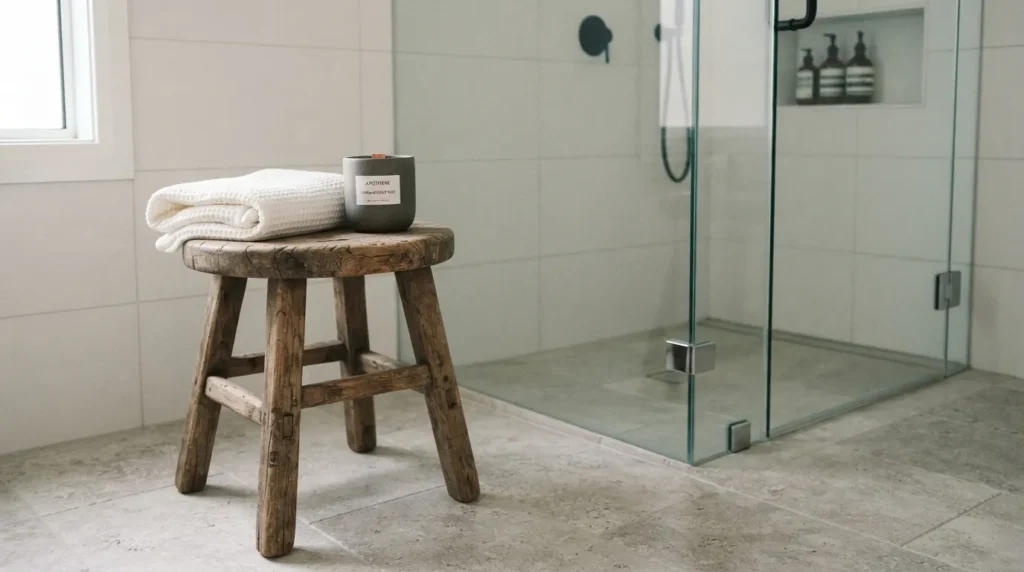
Every balanced room needs a touch of texture that looks completely imperfect and lived-in. When a bathroom features nothing but brand-new polished porcelain, gleaming glass, and shiny metals, the atmosphere can easily end up feeling cold and uninviting. A tapered wooden stool made from antique or reclaimed timber brings an immediate sense of history, character, and soul into the space. The rich texture of the weathered wood grain breaks up the non-porous surfaces, making the entire design feel softer, more balanced, and welcoming.
How To Style It
Place a small, antique elm or weathered oak stool right beside your walk-in shower enclosure or next to your soaking tub. Use its top surface to display a neatly rolled organic linen hand towel, a small concrete bowl filled with natural bath sponges, or a favorite book. Look for a stool with a raw, matte finish that highlights natural cracks and wood knots rather than a highly varnished piece, allowing the organic texture of the wood to contrast with your smooth, contemporary tiles.
Featured Snippet Optimizations
How do you design a functional bathroom layout?
To design a highly functional bathroom layout, prioritize clear zoning based on daily usage patterns. Keep the vanity station easily accessible near the entrance, as it is the most frequently used area. Shield the toilet zone from the direct line of sight using half-walls, glass partitions, or clever placement behind the door. Ensure there is at least 30 inches of clear space in front of the toilet and shower entrance to allow for comfortable movement and proper door clearance.
What is the most durable material for a bathroom vanity?
The most durable material for a bathroom vanity base is solid hardwood, such as white oak or walnut, sealed with a specialized moisture-resistant marine varnish. For a more budget-friendly option, high-density furniture-grade plywood topped with a natural wood veneer performs exceptionally well in humid environments. Avoid cheap medium-density fiberboard (MDF) or particleboard, as these materials easily absorb moisture over time, leading to swelling, peeling, and long-term structural damage.
Related Articles
- Cozy Bedroom Ideas for a Relaxing Space
- Small Living Room Layouts That Maximize Flow
- Modern Farmhouse Decor Inspiration for Your Home
- Neutral Home Styling Tips for a Clean Aesthetic
- DIY Accent Wall Ideas to Instantly Elevate a Room
FAQ Section
What is the difference between a wet room and a traditional bathroom design?
A wet room features a completely waterproofed, open-concept floor plan where the shower stall sits level with the rest of the room, eliminating a raised shower curb. The entire space is engineered with sub-floor tanking membranes and continuous drainage to handle water exposure safely. A traditional design uses a distinct, raised shower tray or tub enclosure to confine water to one specific zone, requiring less extensive structural waterproofing across the outer floor and walls.
How do I choose the right tile size for a small bathroom design?
To make a compact space look larger, opt for large-format tiles, such as 12×24 inch rectangles, on both the floor and walls. Large tiles drastically reduce the number of visible grout lines, creating a smooth, continuous surface that tricks the eye into perceiving more space. Avoid using tiny mosaic tiles over large surface areas, as the dense grid of grout lines can create visual noise that makes a tight room feel frantic and confined.
Can you put dimmable lights inside a shower enclosure safely?
Yes, you can absolutely install dimmable lights inside a shower enclosure, provided you select fixtures specifically rated for wet locations. These specialized low-voltage recessed lights feature sealed rubber gaskets and moisture-proof housings to prevent water penetration. Wiring these fixtures to an independent dimmer switch allows you to switch from bright, functional lighting for your morning routine to a soft, relaxing ambient glow for evening baths.
Why is a wall-mounted faucet recommended for modern vanities?
Wall-mounted faucets are highly recommended because they clear up valuable countertop real estate behind the sink basin, making small counters much easier to wipe clean. From a styling perspective, they deliver a clean, architectural look that feels custom-made and high-end. However, they do require precise rough-in plumbing installation behind the drywall before tiling, meaning your faucet height and spout projection must be planned accurately early in the project.
How can I add natural warmth to an all-white bathroom design?
To soften an all-white space, focus on introducing organic textures and warm accent materials. Incorporate a natural wood vanity base, style a vintage wood stool beside the tub, or add open wicker baskets for storage containment. Swapping out cool chrome hardware for warm brushed brass or oil-rubbed bronze fixtures instantly breaks up the starkness, while introducing live trailing plants adds vibrant color and life to the room.
Conclusion
Mastering the art of bathroom design is all about striking a perfect balance between everyday functional utility and your personal style goals. As we have explored throughout this guide, creating a publication-ready sanctuary doesn’t require chasing every passing online trend or overcomplicating your floor plan. By focusing heavily on the structural choices that improve flow—such as getting cabinetry off the floor with a beautiful ribbed vanity, opening sightlines with reeded glass partitions, or smoothing out your surfaces with curbless linear drains—you naturally build a space that feels calm and cohesive.
The most important takeaway to remember is that every single material you bring into your floor plan should serve a functional purpose while adding rich texture to the room. Do not be afraid to step outside your comfort zone by mixing your metallic finishes or introducing an antique wood accent piece to give the space a lived-in, curated feel. Start by selecting one or two key updates from this guide that speak directly to your daily routine, and gradually refine your layout into a peaceful, high-end environment that supports your morning energy and welcomes you home with comfort every evening.